Friday, December 21, 2012

Handmade Holiday Ornaments

Are you ready to have some messy holiday fun? 
These handmade holiday ornaments are so cute and simple to make!
Thanks to my friends at Sew Memphis for sharing this awesome idea! All you need to get started are a couple of plastic Christmas ball ornaments, Mod Podge, scissors, and some colorful fabric scraps.
 
Cut the fabric scraps into small pieces. They should not be any larger than 1/2-inch by 1/2-inch. Pour the Mod Podge into a paper or plastic bowl. For a great sensory experience, dip a fabric scrap into the Mod Podge then smooth it onto the egg using your fingers. If you want your students to work on grasping, you can use a small sponge paint brush to "paint" the Mod Podge on to fabric scraps. Both sides of the fabric should be covered with the Mod Podge.

Keep adding fabric scraps until the ornament is completely covered. Tie on a colorful piece of yarn or ribbon in a loop and and hang it up to dry. Your handmade holiday ornament is ready for the tree!
 Aren't they awesome? 
Dear Readers, If you have found my blog to be helpful, please "like" my Facebook page and follow my blog...I'm trying to get my book published and this would be a great help! Thanks :) 

Wednesday, December 19, 2012

Music Therapy Holiday Gift Idea!

Are you searching for the perfect Holiday gift idea for a child with special needs? If so, keep reading!

Ryan Judd is a board certified music therapist. He believes that children with special needs deserve to learn and develop in a fun, creative and motivating atmosphere, and his mission is to teach parents, educators and therapists how to use music therapy to help children with special needs learn, grow and thrive! 

His website www.therhythmtree.com is an amazing resource for therapists and parents of special needs children. It includes lots of information about music therapy as well as a videos of fun, interactive, therapeutic music activities!

I was so excited when I discovered that Ryan recently released a Rythm Tree DVD Package! I contacted Ryan and asked his permission to post about his website and the DVD package and guess what? He's offering a 10% discount on the package just for my readers! To order, just click HERE and enter the code JINGLE during check out. What a wonderful gift idea!
Image used with permission from www.therhythmtree.com

The Rhythm Tree DVD Package includes:
  • A 56-minute DVD with nine fun and engaging songs that address various developmental goals
  • Bonus DVD chapters on:
  • How to use effective prompting strategies
  • How to make homemade instruments and use them to address therapeutic goals
  • How to adapt instruments so that any child, regardless of physical ability, can play them successfully
  • A full-length CD with all nine songs included
  • A 30 page guidebook that gives you the music and lyrics for each song and includes specific strategies and techniques for addressing developmental goals
  • 3 sets of fun and motivating instruments including:
  • Two tambourines
  • Two pairs of maracas
  • Two pairs of rhythm sticks
Thank you Ryan for your amazing music therapy website and for offering a 10% discount to the readers of Pediatric OT Tips!


Tuesday, December 18, 2012

Making a Difference for Individuals with Special Needs!


I’m starting something new here on Pediatric OT Tips and I’m extremely excited about it! Every two months, I’m going to feature a very special person who makes a difference in the lives of special needs children in a big way. The individuals that will be featured are committed and compassionate and have taken action to open doors for children with special needs, and I’m looking forward to sharing their stories.
Tereson Dupuy-Image from teresondupuy.com

Tereson Dupuy had a problem, and not only did she come up with an idea to solve that problem, she turned her idea into a multi-million dollar business! Tereson’s son, Eden, was born with severe eczema and suffered from chronic diaper rash. After trying every cloth diaper on the market to no avail, she realized that chemicals and the moist cotton from the diapers were causing the rash. Solution…FuzziBunz® cloth diapers! Tereson created a modern cloth diaper, that is soft, easy-to-use, and eliminates chemicals and diaper rash! To top it off, she’s expanding her business to reach all ages to truly bring comfortable products that meet the entire lifespan of an individual.
Not only is Tereson a cloth diaper expert, she also has a passion for business. She established TeresonDupuy.com, which is an amazing platform that assists entrepreneurs in creating successful businesses. Her lessons focus on perseverance, patience, pride and passion – the 4Ps! Click HERE to visit Tereson’s website and learn how to turn an idea that you have into a business.
When Tereson’s son Eden was diagnosed with Asperger Syndrome, a form of Autism, her family and community were extremely supportive. She also discovered support and information through Autism Speaks, a national advocacy organization dedicated to funding autism-related research and helping families impacted by autism. Read on as Tereson’s shares how she is “giving back.”
Image from http://www.fuzzibunz.com

“…in Eden's honor, FuzziBunz® will donate $1 for every "Light It Up Blue" diaper we sell to Autism Speaks. The diapers are the same price as the all the other FuzziBunz® cloth diapers—so I hope you'll simply add the Light It Up Blue diaper to your stash and know that, by doing so, you're helping families like mine cope with autism and that you're contributing to our nation's plight to find a cure.”  Read more about Tereson’s advocacy by clicking HERE to visit her website.

A sincere thanks to Tereson Dupuy for making a difference by supporting Autism Speaks!

Tuesday, December 4, 2012

Fun Christmas Tree Craft!

It's holiday time and one of my favorite classes at Shilling Farms Middle School is working on a fun Christmas craft and I'm excited to share it with you. This is a great therapeutic activity because it involves folding paper!

Materials needed:
Old magazines
Silver and Green Spray Paint (for adult use only)
Elmer's Glue
Glitter
Painting sponge brush
Pom Pom

Begin by folding each page of the magazine as it's being done in the video. Be sure to bring the first fold as close to the spine of the magazine as possible.


The folding is very time consuming, so it's a good idea to have your students take turns folding. An adult can provide assistance as needed. Once the folding is complete, the tree will look like this:


At this point, an adult should take the "tree" to an outdoor (well-ventilated) area and spray paint the exterior. Once the paint dries, have the students "paint" the trees with a mix of 2 parts Elmer's glue to to 1 part water. See video:

Before the glue dries, the student should sprinkle the wet glue with glitter. Final step: Glue a pom-pom or some other decoration to the top of the tree and wait for the glue to dry. What a nice holiday decoration!

Dear Readers, If you have found my blog to be helpful, please "like" my Facebook page and follow my blog...I'm trying to get my book published and this would be a great help! Thanks :) 

Monday, November 19, 2012

Teaching Colors Using Multi-Sensory Instruction


If you are working with a student who is having difficulty learning his colors, implementing a multi-sensory approach might be effective.

Pair each color with a song. The following songs are nice because each color song has a different tune:

Black Color Song
Red Color Song
Yellow Color Song
Blue Color Song
Green Color Song
Purple Color Song
Orange Color Song

Pair each color with a scent. (The child can even smell the appropriate scent while she sings each color song). Scented markers are great and are available at Amazon.

Black- Licorice                Red-Cherry             Blue-Blueberry
Yellow-Lemon                Green-Mint              Orange-Orange
Brown-Cinnamon         Purple-Grape          Pink-Melon
Turquoise-Mango      Dark Green-Apple    Magenta-Raspberry


Photo Credit Salvatore Vuono @ freedigitalphotos.net

Connect the color with something meaningful. "Goldfish snacks are orange. The ball in the therapy room is blue." Food is especially good because it pulls in the sense of taste...."lemons are yellow, orange juice is orange."

Here's an example of an approach I used in therapy:

The student sits on the red therapy ball and tosses several red balls into a red bucket as I sing or play the "red song". Then we move to a table and the child colors a picture of a red firetruck  using the red scented marker while the "red song" is playing in the background.


Eventually, the pairing should not be necessary, but initially the goal is to help the student associate the smells, songs, etc. with the particular colors. At some point, when the child sees the color green, the song & smell for green should come to mind and this will help them remember "that's the color green." 


Thursday, November 15, 2012

Multi-Sensory Instruction for Handwriting: Stencils and Raised Letter Cards

Here is a simple way to make letter stencils and raised letter cards. All you will need are several sheets of craft foam, available at craft stores or on Amazon, a pair of scissors and card stock paper (old file folders also work well). Choose the letters for the stencils. A student that I have been working with is learning the capital letters L and F, so I made stencils/raised letter cards for those letters. 

Write the letter on the foam and cut it out. Take care to keep the letter “cut out” intact. To make your raised letter cards, just glue the “cut out” to a rectangular piece of card stock. (I like to laminate the card stock first). 

 First, have the child trace the raised letter card with their index finger. While tracing, pair the motion with verbal cues for forming the letter. The “Handwriting Without Tears” language is good. For example, for an F, say “long line down, top across, middle across.”

After several tracing trials, have the student write the letter using the stencil while verbally repeating “long line down, top across, middle across.” For tracing, the child can use a marker, crayon, or even a “squiggle” pen. You want it to be fun! 
 Finally, have the student write the letter without the stencil using the verbal prompts. Gradually fade your verbal prompting.

The great thing about these materials is that you can use them over and over again!

Dear Readers, If you have found my blog to be helpful, please "like" my Facebook page and follow my blog...I'm trying to get my book published and this would be a great help! Thanks :) 


Thursday, November 8, 2012

Live Your Most Authentic Life

How many hats do you wear in an average day? The list is probably quite long... mom, wife, chef, employee, chauffer, housekeeper, friend, caregiver, and many more!

You dedicate countless hours to your many responsibilities, why not set aside some time for yourself? You can do this by signing up for my new self improvement course, Living Your Most Authentic Life. For more information about the course, click HERE.

As soon as you sign up for the course (you choose how much you want to pay), your first lesson will be available. The remaining lessons will be emailed to you weekly. Don't miss out on this opportunity for self-improvement!

Here are several of the topics that are covered:

The Path to Self-Discovery

Understanding and Dealing with Discontent

How to Live Passionately and Discover Your Soul's True Joy


 Click HERE to sign up!

Saturday, September 22, 2012

Cutting on the Lines: Teaching Tips

It can be a challenge to teach a a child to cut on the lines, especially if the child has motor skill or perceptual problems. Here is another approach that I frequently use when working on scissor skills and teaching students how to cut on the lines.

When working on scissor skills, always start with card stock paper. It is much easier to handle and the child will get more sensory feedback while cutting than with regular paper. Make the cutting lines bold and dark, then outline the cutting lines with neon "puff paint." You can find this at craft stores or on Amazon. When the puff paint hardens, it is difficult to cut across with scissors! This provides a tactile "clue" when the child veers off of the line. How closely you put the puff paint to the cutting line depends on how skilled the child is with cutting. If a child is just learning to cut on the lines, leave 1/4 to 1/2-inch of space between the puff paint and cutting line, and narrow the space as the child learns to cut with more accuracy.

Tell the child to "touch the black line with your scissors" and remind her to keep both "thumbs up" while cutting.
If you don't have any puff paint, you can also cut sticky back craft foam to the appropriate size/form and stick it on either side of the cutting line. 


Great cutting!

Dear Readers, If you have found my blog to be helpful, please "like" my Facebook page and follow my blog...I'm trying to get my book published and this would be a great help! Thanks :) 

Monday, September 3, 2012

Tummy Time Tips to the Rescue!

As a parent, do you dread tummy time? Does your baby cry every time you position her on her belly? Thankfully, with time and a few simple techniques, any infant can learn to tolerate tummy time. I have a website that shares a number of tips on how to introduce tummy time and increase an infant's tolerance without making parents' and baby's life miserable.

Tummy time that is provided on a daily basis leads to the mastery of important motor milestones, such as rolling over, pulling up, and crawling. Also, infants who aren't exposed to tummy time are at risk for motor skill delays and developing flat spots on the head. So click HERE to visit Tummy Time Tips, and be sure to check out the video!

For additional fun tummy time activities, you can now purchase my parenting book, "Retro Baby," on Amazon!!

Also, for more information about tummy time as well as some wonderful brochures and handouts, visit http://www.pathwaysawareness.org/.


Dear Readers, If you have found my blog to be helpful, please "like" my Facebook page and follow my blog...I'm trying to get my book published and this would be a great help! Thanks :) 

Sunday, August 26, 2012

Plagiocephaly & Torticollis Awareness Day: Please Help by Signing This Petition

Click HERE to sign the petition!
 
Are you familiar with plagiocephaly and torticollis? The number of infants diagnosed with flat spots on the head (plagiocephaly) and tight neck muscles (torticollis) have been on the rise in America. Recent studies cite incidence rates of plagiocephaly as high as 48%, and one study cites a six-fold increase in rates of incidence, increasing from 1 in 300 infants to 1 in 60.

These conditions are serious, and we need to bring attention to them with a PLAGIOCEPHALY & TORTICOLLIS AWARENESS DAY in order for parents to recognize the signs early and get their children the help that they need early on.

Here is a testimonial from a mom who has dealt with these conditions first hand:

Both of our sons developed plagiocephaly after birth. With our first, I noticed that he tended to always look to one side right from birth, but even though I'm a physical therapist myself, it never occurred to me that he might have torticollis (tight muscles in the neck) or develop a flat spot– I was so worried about breast feeding, lack of sleep, and everything else that comes along with a newborn that I just wasn't looking at my baby through PT eyes!

When my son was about 10 weeks old, we finally noticed his tendency to look to one side and the flat spot that was developing, so we went to the pediatrician, who told us not to worry about it, and repeatedly telling us "it will round out on its own". I think my husband and I were in denial a little, not wanting to even consider that it might not resolve on its own. So we waited and waited, and didn't pursue further intervention until he was almost 1 year old.

At that time, we went to a local Occupational Therapist who specializes in babies with torticollis. She is a very skilled therapist, as well as a very warm and empathetic person– she is a wonderful clinician. She began educating us on stretching and positioning, and strongly recommended cranial banding due to the assymetry in his face, ears, and jaw. Our son began wearing the helmet shortly after his first birthday (which is very late in terms of effectiveness for cranial banding!), and wore it 23 hrs/day for 3 months. I was SO anxious about the helmet, and remember crying about my poor baby having to wear it… but we had it painted to look like a footbal helmet, and he actually looked really cute in it and it didn't bother him one bit. Most importantly, it worked!

He is now 5 years old and has a perfectly round head with no assymetry. Also, the OT and our pediatrician (who later got on board with treatment) wrote excellent letters to our insurance company, and our cranial band was paid for IN FULL– we were amazed and ecstatic!

Our second son was born about a year after our first came out of his cranial band, and he also had a strong tendency to look towards one side right from birth. The second time around I was definitely watching him through my physical therapist eyes! We noticed the torticollis immediately and brought him to our OT within about 2 months. We started doing weekly OT sessions and home exercises,  as well as using our knowledge about appropriate positioning and use of tummy time, and after a couple months his flat spot had disappeared and he was no longer turning his head in only one direction.

 I feel strongly that if we had not intervened as early as we did with our second son, we would have ended up needing a cranial band for him too, so I'm so happy that we knew better the second time around. I hope this information might be helpful to anyone who is in a similar situation, unsure of whether or not to pursue further intervention. If you notice a flat spot or limited range of motion in the neck at all, I would definitely recommend purusing intervention… cranial banding is non-invasive and very effective, but can be expensive (depending on your insurance) and time-consuming, so all the more reason to pursue early intervention to possibly eliminate the need for a band at all!

How can you can help?

Monday, August 20, 2012

Stencils for Prewriting Strokes

Do you have a student or child working on prewriting strokes? I recently started seeing a student for therapy who was already using these stencils, and they are so clever, I had to share them with you!
Basically, all you need are several file folders (colored file folders are nice), a black marker, a laminating machine, and sticky back Velcro (click here to buy on Amazon).
As you can see with these, the student is working on forming a half-circle, a diagonal line, and a half square. First, cut the "pathway" that you need (half-circle, diagonal line, etc.) out of the top side of the file folder. Second, trace the edges of the "pathway" with black marker for a nice visual prompt. Third, laminate the file folder and any loose pieces. Finally, add the Velcro pieces (see below).
 In the photo above, you'll notice the sticky Velcro pieces were added to the bottom and sides of the file folder. The paper should fit inside the file folder, but not cover the Velcro pieces.
Once the file folder is closed, the Velcro pieces should stick together, and the stencil should work like a charm! See the videos above and below. Happy writing!

Dear Readers, If you have found my blog to be helpful, please "like" my Facebook page and follow my blog...I'm trying to get my book published and this would be a great help! Thanks :) 

Saturday, August 4, 2012

MamaOT is Going Strong!

-->
If you are a regular reader of my blog, you know that I get very excited when I discover a new blog. Not long ago, I told you about a wonderful blog written by my pediatric OT colleague Abby called Notes from a Pediatric Occupational Therapist, and before that, I shared Embrace Your Chaos, another amazing blog by an OT.

Today, I want to give a big shout out about another blog that you’ve probably already heard of…MamaOT. It’s written by Christie, a mom, and pediatric OT. Here is what Christie says about the blog in her own words:

“They say it takes a village to raise a child, and I am learning first-hand that that is absolutely true! No one of us can do this by ourselves. We need other people to support us as we invest ourselves into caring for children of all ages. So whether you are a parent, foster parent, family member, babysitter, nanny, or a friend who’s just helping out, my hope is that I can be a part of your “village”. I will do my best to supply you with helpful tips, tricks, ideas, and resources that will boost your ability to care for the kids in your life.”

So if you haven’t already, head on over to MamaOT and check out all of the wonderful information. Here is a little preview of one of my favorite posts! 

 Messy Play with Rainbow Spaghetti
 Photo from MamaOT.com

Messy play is great because it gives kids a chance to:
-have fun
-explore and learn about various textures using their sense of touch
-gain extra sensory input for those who need more than the average kid
-decrease sensitivity for those who avoid textures that feel “weird” or who are picky eaters...
Click Here to read the rest of the post and get the recipe for rainbow spaghetti!


By the way: Notes From aPediatric Occupational Therapist, and MamaOT, The Recycling Occupational Therapist (my friend Barbara Smith’s OT blog) and Pediatric OT Tips were all included on Rehab Alternative’s list of Top 10 OT Blogs, and Embrace Your Chaos was the bonus blog. Way to Go Ladies!!!

Dear Readers, If you have found my blog to be helpful, please "like" my Facebook page and follow my blog...I'm trying to get my book published and this would be a great help! Thanks :) 

Thursday, August 2, 2012

Scissor Skills Article

Check out my article "Teaching Preschoolers to Use Scissors" on Parents.com! 

(Photo credit: Parents.com site)


Dear Readers, If you have found my blog to be helpful, please "like" my Facebook page and follow my blog...I'm trying to get my book published and this would be a great help! Thanks :) 

Monday, July 30, 2012

Social Story for Playing Nicely

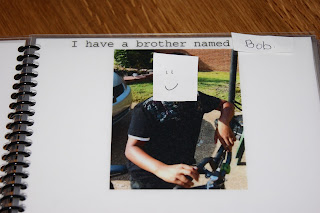
Here is a fun social story that I put together for a parent who was having some challenges with his child's behaviors at home. He shared that his oldest son was having difficulty playing nicely with his younger brother, not wanting to share toys and having tantrums at times. Here is the social story booklet that I put together for them. Whenever possible, I like to use actual photographs in my social stories because I think that children can relate to the story on a more personal level. (I have covered the photos and the boys names to maintain their privacy.) 
  
If you have difficulty reading the text, it says: 


I play nicely with my brother.
My name is Joe.
 I have a brother named  Bob.
Sometimes Bob and I play together.
Lots of times we have fun playing together.

But sometimes we both want to play with the same toy.

I don't like to share the toy with my brother. This makes me angry and I sometimes have a tantrum.

When I have a tantrum, I usually hit my brother, lean on him, and pull his shirt.

But if I hit my brother, and do those things, he will get hurt and won't
want to play with me any more.


I like to play with Bob.

When I don't want to share a toy with Bob, instead of having a tantrum and hitting, leaning or pulling Bob's shirt, I will watch a video on You Tube to make me feel better.

I like my brother. I will not hurt him.


Dear Readers, If you have found my blog to be helpful, please "like" my Facebook page and follow my blog...I'm trying to get my book published and this would be a great help! Thanks :) 

Notice that as an alternative to the negative behaviors (tantrum, hitting, leaning, etc.) Joe is given something else to do that makes him feel better. I specifically asked what he liked to do that would be a positive alternative to the tantrum (watch a video on You Tube) and included that in the social story. This could be listening to calming music, singing a song, jumping on a trampoline, or any other positive alternative.

Social stories are great tools for building social skills! 


Tuesday, July 24, 2012

Squiggle, Wiggle Writer: Fun Therapy Tool!


Have you ever seen a Squiggle, Wiggle Writer? It is a great little vibrating pen that can be used in therapy, and kids absolutely love it! It is triangular in shape and slightly heavy, so it's great for helping a child learn to use more pressure when writing, especially when the vibration component is turned on. In order to maintain control of the pen, a child has to press down fairly hard. The vibration also increases kinesthetic awareness of the hand.


As you can see in the video, this child is not resting her forearm on the table. She's using whole arm movement to control the pen. After I prompt her, (on the second line) she rests her forearm on the table, which encourages her to use more wrist movement and finger dexterity for writing.

I also love these pens because they come with several small color cartridges. The cartridges can be used without the pen and their small size promotes a nice pencil grasp. As you can see in the video below, the student is struggling to maintain an appropriate grasp on the cartridge while forming a star. She keeps a nice open webspace the entire time, but she occasionally lifts her forearm off of the table and reverts to wrapping her thumb around her index and middle fingers, but with prompts and a little assistance, she is able to complete the task successfully. This is a great exercise for the intrinsic muscles of her hand (which are quite weak).


Squiggle, Wiggle Writer's  are available on Amazon and on most therapy websites.


Dear Readers, If you have found my blog to be helpful, please "like" my Facebook page and follow my blog...I'm trying to get my book published and this would be a great help! Thanks :) 


Monday, July 16, 2012

Wonderful Blog: Notes From a Pediatric Occupational Therapist


I have to tell you about another wonderful OT blog, Notes From a Pediatric Occupational Therapist. It is written by Abby, a pediatric occupational therapist with experience working in school-based practice, early intervention (birth to three), and feeding therapy. She created this blog as a place to share her thoughts and ideas about pediatric occupational therapy, and to share resources with therapists, parents and teachers. It is an amazing resource that you need to check out!

She also has an amazing new feature called A Parent’s Perspective. Every week, she will be feature a family with a child (or children) with special needs to share their perspective on the therapy process, share their favorite resources, and share pictures of their fantastic kids! In fact, she is currently looking for more families to feature, so contact her at AbbyPediatricOT [at] gmail [dot] com if you are interested.

Here are Abby’s goals for the Parent's Perspective feature (taken straight from her blog):

1. Provide therapists with a parent's perspective on the therapy process, which will hopefully help therapists become more empathetic and reflective in their practice.

2. Connect parents of children with special needs to other parents in a similar situation.

3. Allow parents and professionals to share their favorite resources that make life a little easier/to help families share their thoughts on therapy with therapists.

Please visit Notes from a Pediatric Occupational Therapist and subscribe to Abby’s posts. You’ll be glad you did!


Dear Readers, If you have found my blog to be helpful, please "like" my Facebook page and follow my blog...I'm trying to get my book published and this would be a great help! Thanks :) 

Thursday, July 12, 2012

A Must-Have Resource: "From Rattles to Writing"


                            "From Rattles to Writing" by Barbara Smith, MS, OTR/L
                     Bonus! It's 10% off during the month of July at Therapro!

This book is a must have for therapists, parents, and any professional that works with young children! Are you in need of a solid resource full of fun, playful activities that help children build a strong developmental foundation? If so, “From Rattles to Writing” is for you! In this wonderful book, occupational therapist Barbara Smith shares skill-building games, songs, activities, and toys for children with and without special needs. The activities in this wonderful resource develop the visual motor and sensory processing skills that are necessary for a child to be successful in school. There are also specific strategies for improving pencil grasp, writing, and cutting with scissors. “From Rattles to Writing” is #1 on my list of highly recommended books! 

Barbara Smith, M.S., OTR/L is also seminar presenter and author of The Recycling Occupational Therapist. For more information, check out her website at: RecyclingOT.com.

Sunday, June 17, 2012

Survey for OTs & PTs: I Need Your Help!


Thanks to all pediatric OT's and PT's who completed the baby gear survey! I have over 150 responses! I will let you know the results as soon as I write them up. :)

Background of Study: 


The Back to Sleep campaign has been a huge success and thousands of infant lives have been saved. However, in recent years, the number of flattened head syndrome cases has increased by approximately 50%, and the number of torticollis cases has also increased. A survey of 400 PTs and OTs revealed that 2/3 of the therapists surveyed reported an increase in infant motor delays in the past 6 years. Many therapists believe that back sleeping combined with the large amounts of time that babies are spending in "containers" (carseats, bouncer seats, etc.) are contributing to these developmental problems. I will use the survey responses from over 150 pediatric OTs and PTs to come up with some "general guidelines" for baby gear use in hopes that this will be helpful to parents.