Showing posts with label Fine Motor Activities. Show all posts

Tuesday, July 7, 2026

Worry Monster Craft for Kids

This "Worry Monster" craft for kids is a an effective therapeutic activity to help children deal with their anxiety and worries. A child can simply write down or draw a picture of what worrying them on a piece of paper. Then encourage the child to tell you about the worry, which will help them process their feelings and work through them. Next, instruct the child to crumple the paper into a small ball and "feed it" to the Worry Monster! Ensure the child that the monster will now deal with the worry so that they won't have to any longer.

Supplies Needed:

  • Empty tissue box
  • 2 pipe cleaners
  • Construction paper in a variety of colors
  • Googly eyes
  • Scissors
  • Scotch tape

Cover the tissue box with construction paper and secure the paper in place with tape. Decorate the box with shapes cut out of the construction paper or use colorful stickers. Be sure to make the monster some teeth! Twist each pipe cleaner around your finger to make a spiral. Tape a circular piece of construction paper to one end of each of the pipe cleaners then stick a googly eye sticker onto each circles. Poke 2 holes in the top of the tissue box, insert each "pipe cleaner eye," and secure them in place with tape inside the tissue box. Now feed those worries to your "Worry Monster."

Monday, June 29, 2026

4th of July Craft

This is a cute 4th of July craft for kids that is easy to create and fun to play with. Making it is also a good way for a child to work on their fine motor skills. 

Materials Needed:

Directions:

Cut a piece of card stock paper to the size of the "Push-up" cylinder/container, cover it, and tape it in place. Decorate the card stock cylinder with stripes, dots, or decorations of your choosing. Cut a handful of ribbons to 5-inches in length and curl the ends. Tape the ribbon onto the "pusher" component of the "Push-up" container. Remove the original "Push-up" cylinder. Insert the "pusher" component into the card stock cylinder. Push-up to launch the firework!!! 


Monday, June 15, 2026

Popsicle Stick Color Matching Activity

This popsicle stick color matching activity is an easy DIY activity! Here are the instructions.

Supplies Needed:
Popsicle sticks in a variety of colors
A small box
Construction paper that corresponds in color to each popsicle stick color
Scotch tape
Scissors
Craft knife

Cut the different colors construction paper into strips that will fit on the top of the box. Secure the construction paper strips in place using tape or glue. (See the photo above.) Using the craft knife, cut a slit that a popsicle stick with fit through through each different color of construction paper as well as the top of the box. 
Have fun matching!
 

Tuesday, June 2, 2026

Simple Color Sorting and Matching Activity


Supplies Needed:


Small plastic cups or bowls in different colors

A spoon

Pom-poms in a variety of colors

This fun sorting activity is a great way for your child to work on color recognition, color matching, and naming colors. It’s also good for fine motor skills, such as grasp and release, crossing midline, and scooping with a spoon. Simply put the pom poms in a container and place the smaller cups next to the container. Your child can begin by transferring the pom-poms from the container to the small cups while naming each color and matching the pom-poms to the corresponding-colored cup. Once your child has mastered this, introduce the spoon and demonstrate how to scoop a pom-pom and place it into the matching-colored cup.


Tuesday, May 19, 2026

Under the Sea Fine Motor Activity!

This is an awesome activity because it’s simple, inexpensive and fun for any toddler or young child. It is a great way for a child to work on the following skills: fine motor, finger isolation, pincer grasp, and visual-motor skills. It is also a good way to address following directions, paying attention, and naming colors. 

Materials Needed:

Simply draw and cut out your child’s favorite sea creature, draw dots that are the same size at the stickers, and it’s time to peel and place the dots! Tip: You can challenge your child and work on color identification by instructing them to find and place a certain color dot!


Thursday, March 19, 2026

Activity for Following Directions

This is a wonderful activity to work on following directions with a child! It is also a great way for a child to learn their colors and shapes. Because the child has to peel and place the stickers with accuracy, it is also a great nice activity for fine motor skills. 

All you need is a blank sheet of paper, some colored markers, and dot stickers in a variety of colors. Draw a variety of shapes in different colors. Now all you have to do is give the child instructions such as, "Put the pink sticker on the pink circle, or put the purple sticker on the purple square."


Monday, February 23, 2026

The Benefits of Play Dough Play!

     Rolling, squishing, pinching, and manipulating Play Dough has so many benefits for toddlers, preschoolers, and young children. In this post, I’m going to focus on two of those benefits: strengthening and bilateral skills.


Developing arm and hand strength is important for growing children, because they are needed for functional skills, such as self-help and fine motor activities. Grip strength and dexterity are needed for buttoning, writing, zipping, and other manipulation tasks. Bilateral skills are necessary for using both sides of the body together in a coordinated manner. This is also called bilateral integration, and it is an important for many activities that your child will carry out in home and at school. If a child has difficulty with bilateral coordination skills, they may end up using one hand alone rather than both hands together, which leads to challenges with certain activities, such as tying shoes, using a knife and fork, cutting with scissors, and buttoning.

     Play dough provide many opportunities to for a child to strengthen their arms and hands and improve bilateral integration. For example, while they are rolling, squeezing, flattening and shaping the dough, they are developing muscles in their little hands and learning to use them together in a coordinated manner!


Tuesday, November 4, 2025

Pom Pom Color Matching Fine Motor Toddler Activity

This DIY pom pom activity is easy to make and will keep your toddler entertained while learning lots of different skills. 

Materials Needed
- Pom poms in various colors
- Toilet paper or paper towel rolls
- Construction paper in a variety of colors
- Scotch tape
- A small box
- Sharpie

If using paper towel rolls cut each paper towel roll in half or use toilet paper rolls. Wrap each roll/tube in a different color of construction paper that matches a pom pom color. You can number the tubes if you want to work on counting skills. Tape the rolls to the back of the box side-by-side. It's time to play! Your child can work on color matching, naming, and counting. This is a great activity to work on grasp and release skills, and as your child's skills advance, they can even add a spoon and work on scooping!


Friday, May 30, 2025

Clothespin Counting Activity

This DIY clothespin activity strengthens the hands and fingers, which improves fine motor skills and helps with handwriting and other manipulative tasks. You can vary the activity to work on matching colors, recognizing numbers, and counting!

You Will Need:
A paper plate or poster board cut into a circle
Different colors of Sharpie markers
Different colors of stickers
Clothespins

To Make the Activity: 
Place colored stickers on the clothespins and the paint stirrer. Use a Sharpie to write/draw shapes, numbers, math symbols and letters on the clothespins and paper plate.  

Activity Instructions: 
Work on matching and placing the corresponding clothespins to the sticker colors and numbers. Instruct the child can alternate hands when placing and squeezing the clothespins.
If the child can't differentiate colors/numbers, etc. you can help them identify which one to match. Position the circle to encourage crossing the midline.
 

Saturday, November 2, 2024

Developmental Baby Toys: Easy Grip Ball Activity...Another Favorite!


I'm excited to tell you about a fun activity to carry out with your baby using an Grasp Classic Ball and some cloth or organza tissue squares. All you have to do is stuff the cloth squares inside of the ball, and show your baby how to pull them out. This activity will help teach your little one about the concepts of "in" and "out." It is also a great activity to help them use both hands together and to work on their pincer grasp. You can also name the colors of the cloth squares as they pull each one out of the ball. Eventually, your baby will gain the skills to stuff the squares back inside the ball, but that may take a little while. If you don't have any cloth or organza tissue squares, you can just purchase some colorful cocktail napkins, and they will serve the same purpose. Your child will love this activity and it will fully entertain them!


Saturday, October 12, 2024

Developmental Baby Toys: A Few of My Favorite Things!

In this post and several future posts, I'm going to share a few of my favorite baby toys that are great for promoting your child's development! The toys that I will be featuring are wonderful for the development of a variety of skills, including cognitive, and fine and gross motor skills.
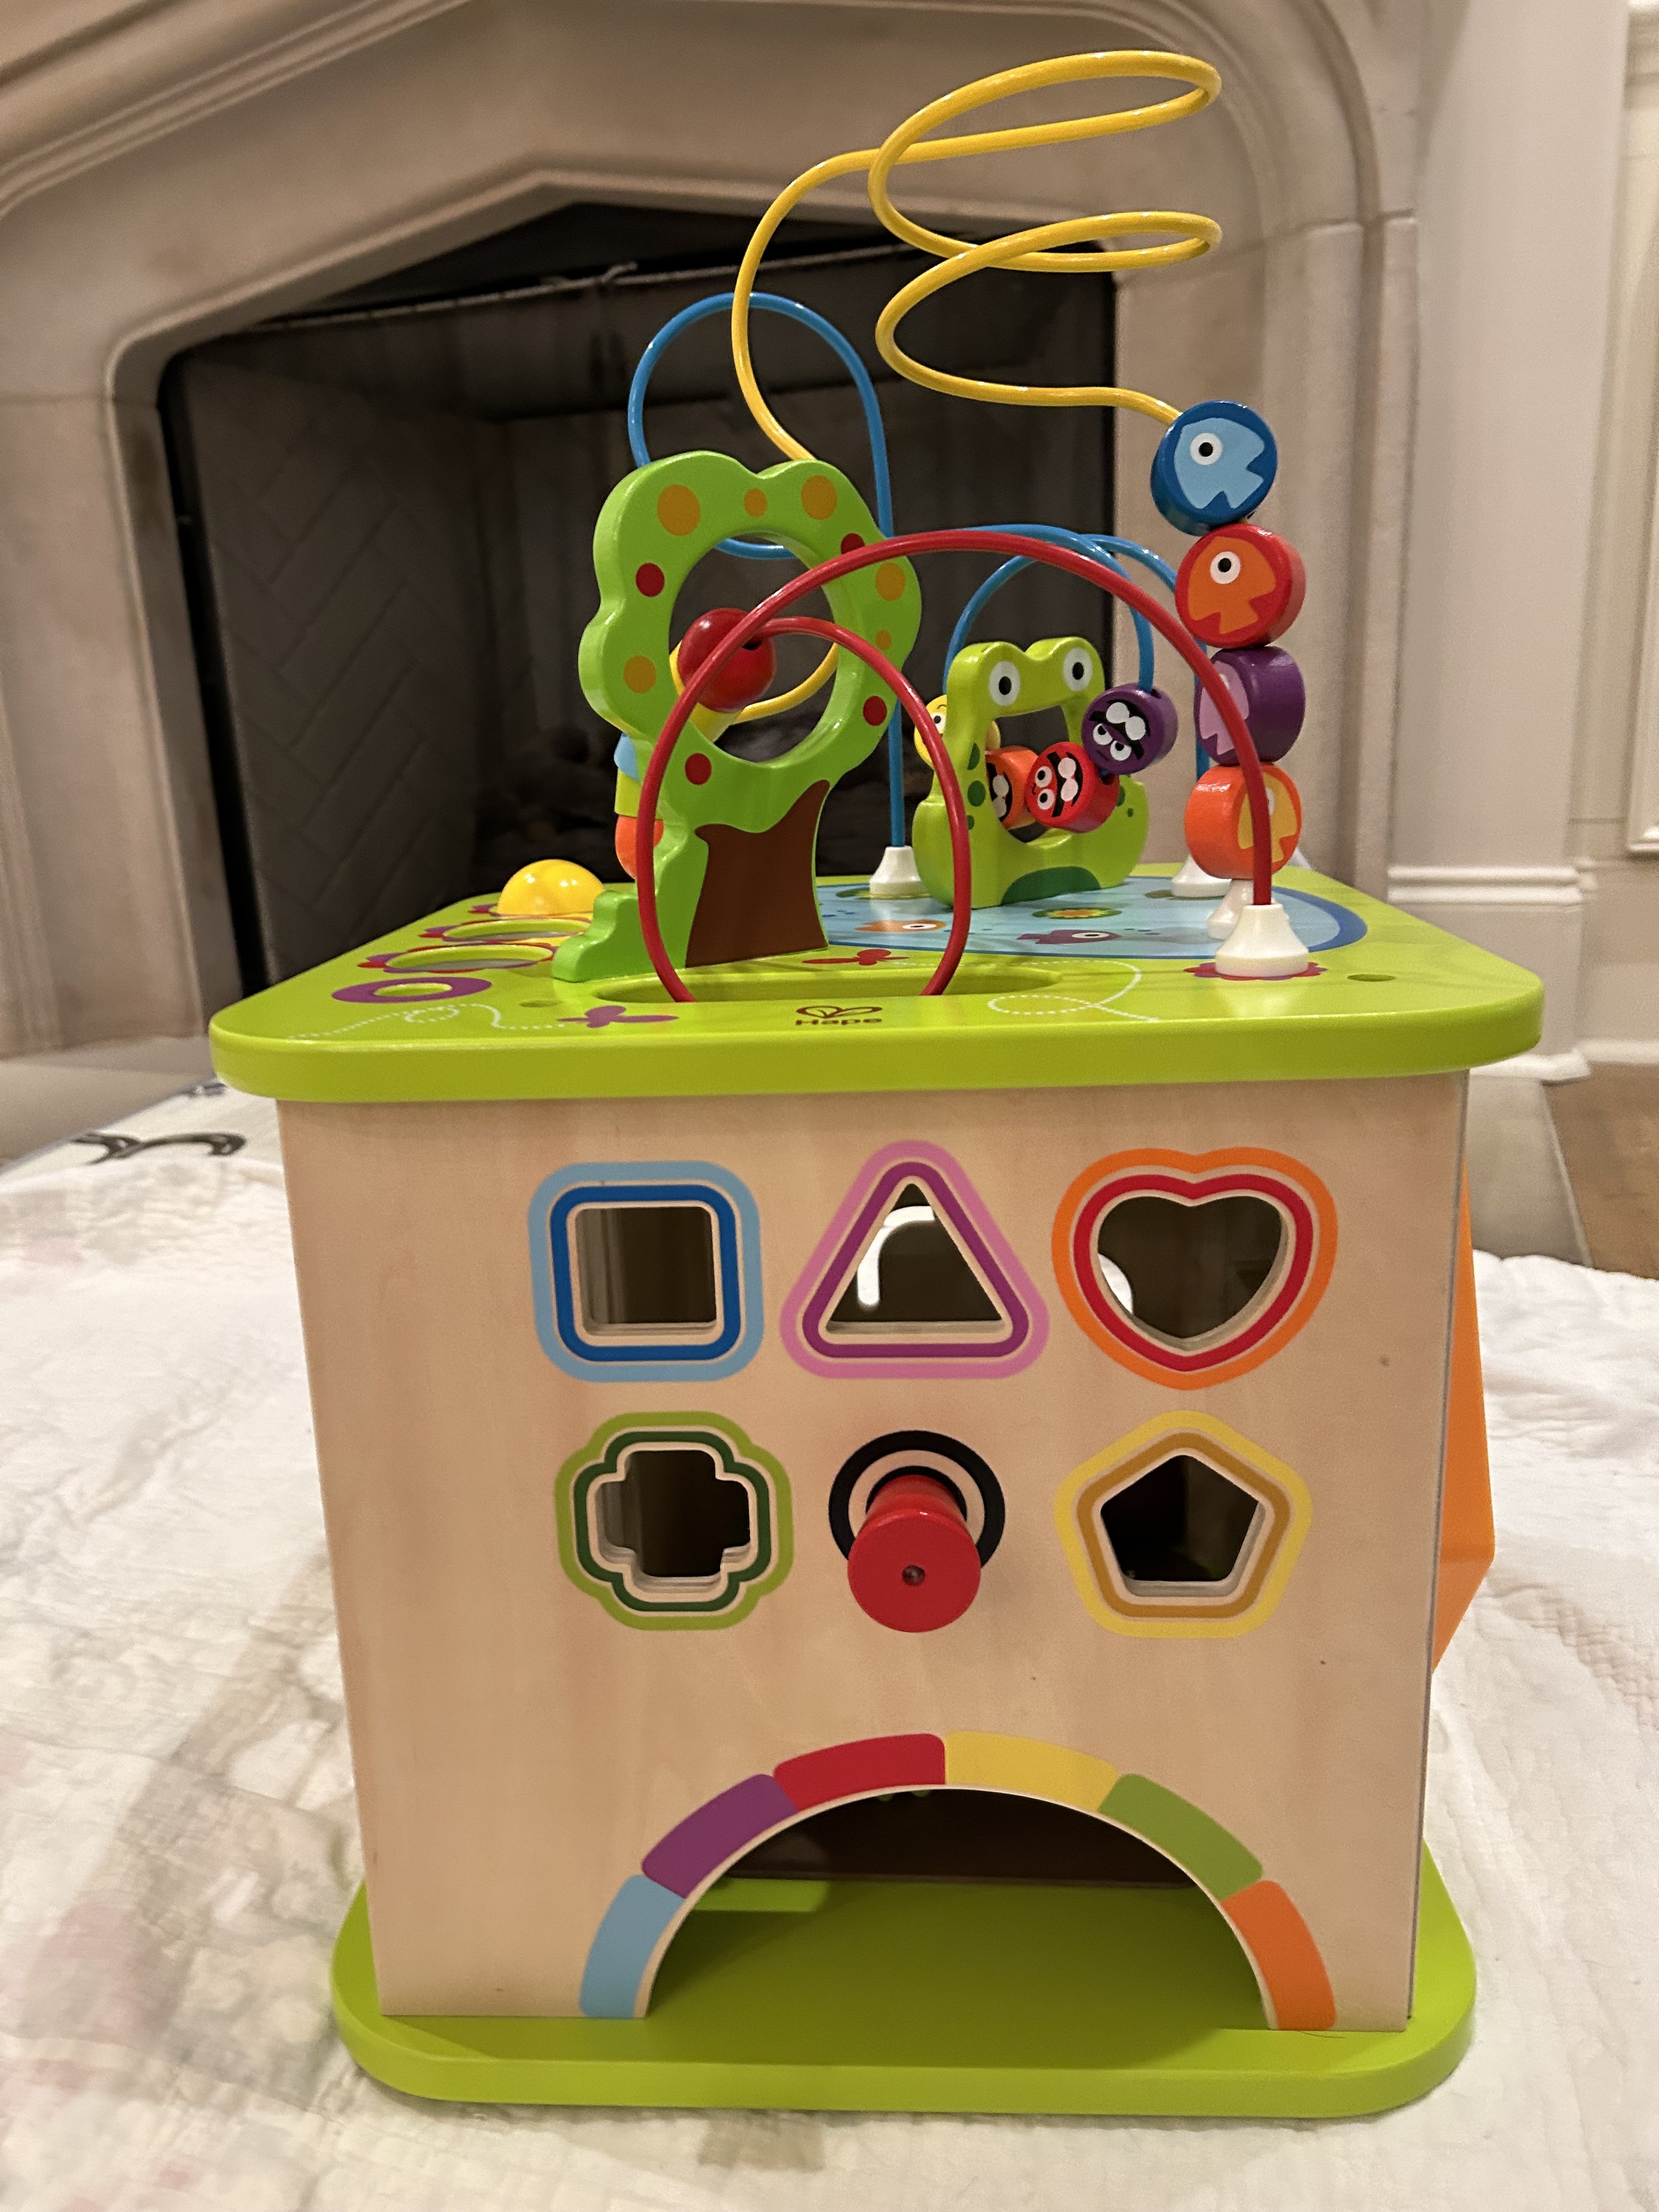
 This Country Critters Wooden Activity Play Cube will keep your baby busy! Each side includes a different activity center with wooden balls, a shape sorter, and much, much, more. My favorite thing about it is that is is sturdy enough for a baby to pull up on and cruise around the edges.
 The activity cube is recommended for ages 12 months to 6 years and will entertain your baby for hours. It is available here on Amazon. 

Monday, January 8, 2024

Make your own Dino Rescue game!

 You can create a dinosaur board game just like this!

Materials:
Cardboard
Construction paper
Clothespins
Large die
Small plastic dinosaurs
Images were downloaded from free online resources
Glue

Create the game cards by including different activities. Examples are: “Stretch tall like a brachiosaurus; Bad weather ahead! Go back 3 spaces; Add a piece to the puzzle; Stretch like a stegosaurus. Do 5 cat/cow poses.”

The object of the game is to make it all the way around the board before the volcano puzzle is complete. This is a wonderful activity that works on taking turns, visual perceptual skills (completing the puzzle), fine motor skills (squeezing and placing the clothespins), learning colors, counting, and much more!

The game’s directions are as follows: 

1. The youngest player goes first.
2. All dinosaurs begin at the starting square.
3. Roll the dice to see how many spots to move.
4. Draw a card corresponding to the color you land on.
5. Follow the card’s instructions.
6. Reach the island of safety by making it all the way around the board.
7. Reach the island of safety before the volcano puzzle is complete!

UTHSC MOT student, Allison Hyatt
Class of 2025

This project was completed by a Master of Occupational Therapy student at The University of Tennessee Health Science Center and posted with permission.

Thursday, July 20, 2023

DIY Froggy Puppet: A Fun Craft!!!

Here is a fun activity to work on fine motor and visual motor skills! It can be graded to be a developmentally appropriate activity for children of different ages and skill levels.

Supplies Needed:
Red & green construction paper
Red & green small paper plates
Google eyes
Glue gun
Scissors

Fold the red paper plate.
Cut the green paper plate in half as pictured below.
Using a glue gun, glue the edges of the white sides of the green and red paper plates together. Do not put any glue on the center of the plates. This area needs to be open because that is where the fingers will be placed to manipulating the puppet.
Nest, cut out a long red strip for the frog's tongue. Then cut out the eyes using the green construction paper as pictured below. Glue the googly eyes on the green paper pieces. I usually put X's on the spot where the child is supposed to put the glue.
Roll the the red strip of construction paper on a pencil to make it curl. Have the child hold either end of the pencil and twist it for a nice bilateral task. See the photo below.
Glue the eyes and tongue to the proper location on the paper plates. Once the glue dries, the puppet is ready!


Tuesday, April 18, 2023

Feed the Gator: Prescissor Skills Activity!

 Feed the Gator!


This is an easy activity to make that requires just a few objects (tongs, pom pom balls, construction paper, glue, and a small disposable tin container. The activity promotes separation between the two sides of the hand, and it builds the muscles and coordination needed to develop scissor skills and fine motor skills.

The first step is to decorate the pan using glue and construction paper. You can make the pan into a gator, frog, or even a bear! Be sure to add the eyes, tongue, and teeth. 

To have the child complete the task, just place the pan on it's side and instruct them to "feed the gator" the pom poms! Click on this link to watch "feeding the gator!"

Suggestions for grading the activity
• Using different tongs (more or less resistance)
• Different size pom poms (smaller = more difficult; larger = easier)
• Smaller target/container (smaller target = requires more precision, more difficult)

This project was completed by a Master of Occupational Therapy student at The University of Tennessee Health Science Center and posted with permission.


Sunday, March 5, 2023

Pincer Grasp Activities


When a child holds a small object between the tips of the index finger and thumbs, this is called a superior or refined pincer grasp. The superior pincer grasp typically develops by 12 months of age, but it may develop a few months earlier in some babies.


Pincer Grasp Activities


Incorporating activates into an infant’s regular routine is a great was to help develop the pincer grasp. At snack time, provide small food items such as Cheerios and put each piece into a different section of a plastic ice tray. This will encourage baby to use a pincer grasp when reaching in to grasp the pieces. I would recommend taping the ice tray to the table or highchair tray so it doesn’t slide around. Here are a few more activities to help develop a pincer grasp.


1.     Peel off stickers small “kids” stickers and place them on a piece of paper.

2.     Tape a piece of contact paper to the wall with the sticky side facing outward. Have your child pick up small pom poms or cotton ball pieces and stick them to the contact paper.

3.     Cut several colorful straws into small pieces. Have the child pick up one piece at a time and drop it into a water bottle.

4.     Take a kitchen whisk and stuff it full of small pom poms and have your child remove them.

5.     Playing with toys that require a pincer grasp provides opportunities for practicing the skill, which is how motor learning occurs. Practices improves muscle strength and coordination, and it will also improve your little one’s confidence!

Sunday, January 16, 2022

Make your own DIY shape sorter toy!

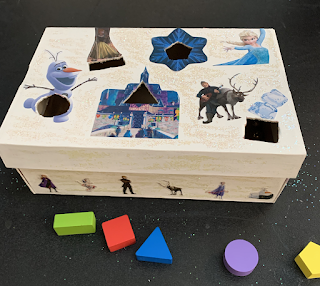
In this post, I am going to explain how to make a DIY shape sorter toy! You probably have the necessary materials right in your home! A shape sorter is a fun activity that helps to improve visual perception skills, spatial awareness, eye-hand coordination, and fine motor skills. When a child plays with a shape sorter, they engage their problem-solving skills and learn about colors, and shapes.


Needed:
- Shoe Box Scissors
- Pencil, crayons, or marker
- Colorful 3-D shapes or wooden blocks
- Contact paper- Stickers

Directions:
Cover the box and lid with contact paper. Secure the edges of the contact paper in place with tape if needed. Place each shape on the lid of the box, and trace the outline of each shape. Use the scissors or a craft knife to cut out the shapes. Press each shape through corresponding hole to make sure they all fit. Have the child help decorate the box using crayons, markers, and/or stickers, and it’s time to play! Have fun!!!
 

This project was completed by a Master of Occupational Therapy student at The University of Tennessee Health Science Center and posted with permission.

Tuesday, July 27, 2021

Home Exercises to Improve Hand Skills

 I am often asked to provide exercises or activities that children can carry out in the home setting to improve hand skills, so I thought I would share some of the tasks that I usually recommend. Please keep in mind that these may need to be adapted to meet the skill level of the child. Also, it is important to make the activities enticing and fun. You can incorporate them into games or time the child completing them so that they can try and improve their time on the next attempt!

Click on the worksheet below for a PDF copy of the worksheet!


Sunday, July 11, 2021

Paint by Numbers DIY Activity: Great for Fine Motor Skills!

Painting by the numbers is an awesome art activity that is good for a child's eye hand coordination and fine motor skills! It is also good for recognizing numbers and colors because the child has to match the number on the color key and then paint that color in the correct space.

Anyone can create this DIY activity! All you need is a basic water color set that can by found at your local craft shop or dollar store. You'll also need some construction paper and a sharpie and possibly some puff paint. Label each color with a number, and then create some simple drawings such as a house, person, tree, car, flower, etc. Next you will need to add numbers to the different parts of the drawings. If the child has difficulty staying in the lines when painting, you can outline the drawings with puff paint! Now it's time to paint. This activity is also a fun way to work on following directions and attending to task!

This project was completed by a Master of Occupational Therapy student at The University of Tennessee Health Science Center and posted with permission.


Saturday, January 23, 2021

Pom Pom Paper Doll: Fine Motor Skill Fun!

This is a cute activity that addresses fine motor skills and motor control!


Items Needed:
Pom poms of various colors
Construction paper
Colored pencils or crayons
Yarn
Scissors
Glue

Draw the figure of a girl wearing a dress on the construction paper. See the photo above. Cut out the figure and snip several pieces of yarn to use as hair. Draw a face and the small circles on the doll’s dress. Color the dress…as seen above. Glue the hair in place.

Once the doll is finished, it’s time to play! The object of this activity is to pick up the pom poms with the tongs, and place the colored pom-pom accordingly on the doll in order to “dress her”.  If the child has difficulty using tongs, have her pick them up using her fingers. This therapeutic activity can be graded up or down in a few ways. You could use smaller tweezers or tongs, which will create a greater challenge.  Different sized pom poms are also an option. Have fun!


This project was completed by a Master of Occupational Therapy student at The University of Tennessee Health Science Center and posted with permission.


Friday, July 10, 2020

Therapy on a Shoestring Budget: DIY Lacing Shape Cards

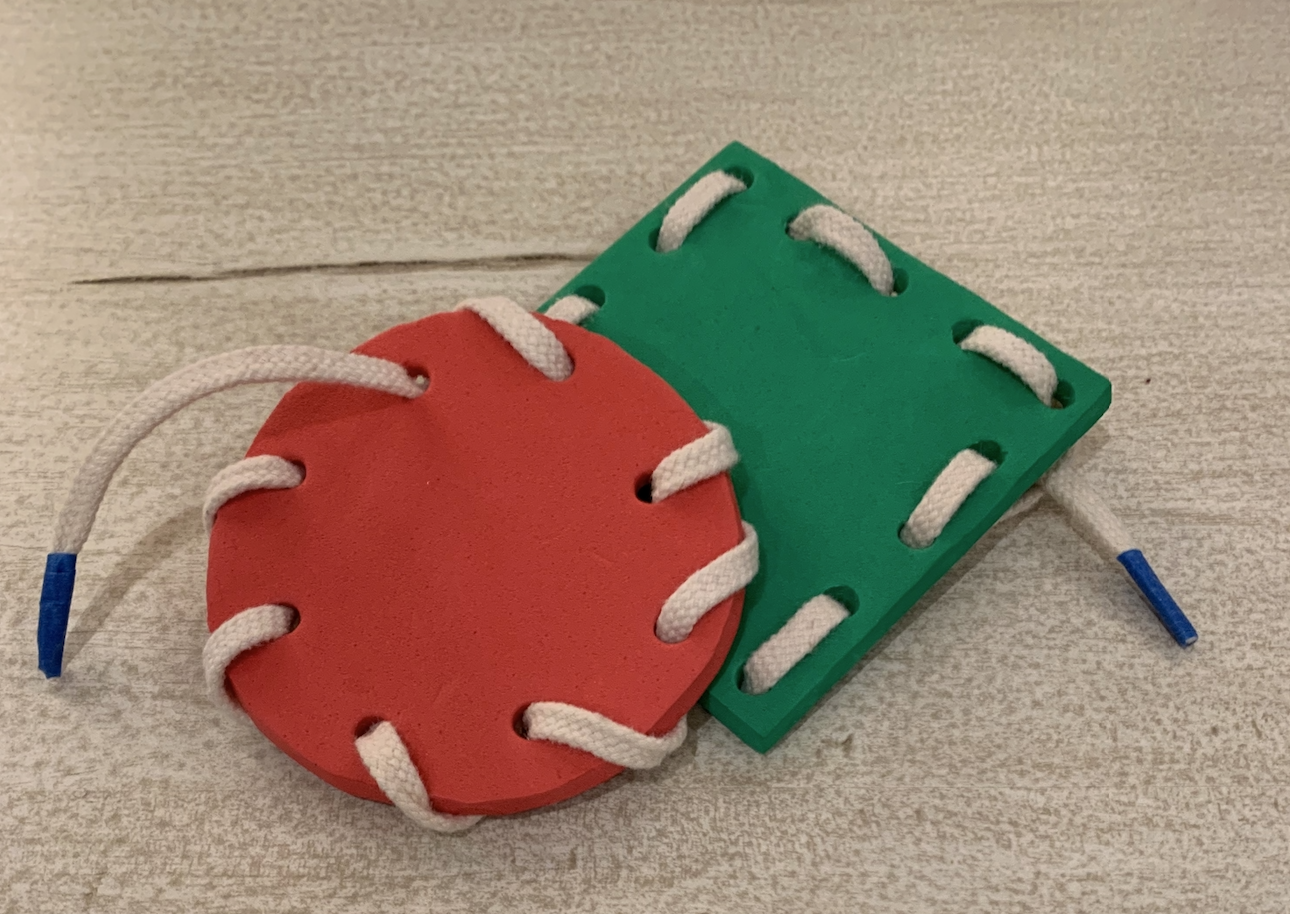
These DIY lacing cards are a fun way for a child to work on fine motors skills, bilateral integration (using two hands together), and motor planning! Making them in a variety of shapes and colors will help a child learn to distinguish their differences. You can also use a sharpie to write letters or numbers next to each lacing hole to work on letter and number recognition. Use your imagination to come up with other fun variations!

ITEMS NEEDED:
Scissors, single-hole punch, Colorations Foam Door Hangers, shoe laces, string, or ribbon

INSTRUCTIONS:
Use this shape sheet as a pattern. (The sizes may need to be adjusted.) Trace each shape onto a different piece of foam, and use the scissors to cut them out, and use the hole punch to punch out the lacing holes. (Save the scraps of foam to use with another DIY project that I will be posting about soon.)

If you are using string or ribbon, wrap a piece of tape around each end. Now it's time to start lacing!