Showing posts with label Bilateral Skills. Show all posts

Monday, February 23, 2026

The Benefits of Play Dough Play!

     Rolling, squishing, pinching, and manipulating Play Dough has so many benefits for toddlers, preschoolers, and young children. In this post, I’m going to focus on two of those benefits: strengthening and bilateral skills.


Developing arm and hand strength is important for growing children, because they are needed for functional skills, such as self-help and fine motor activities. Grip strength and dexterity are needed for buttoning, writing, zipping, and other manipulation tasks. Bilateral skills are necessary for using both sides of the body together in a coordinated manner. This is also called bilateral integration, and it is an important for many activities that your child will carry out in home and at school. If a child has difficulty with bilateral coordination skills, they may end up using one hand alone rather than both hands together, which leads to challenges with certain activities, such as tying shoes, using a knife and fork, cutting with scissors, and buttoning.

     Play dough provide many opportunities to for a child to strengthen their arms and hands and improve bilateral integration. For example, while they are rolling, squeezing, flattening and shaping the dough, they are developing muscles in their little hands and learning to use them together in a coordinated manner!


Saturday, January 25, 2025

Entertaining DIY Activity for Infants & Toddlers

x


This DIY actvity is an inexpensive way to entertain your infant or toddler while they work on their visual motor and bilateral skills! It's a nice way to work on grasping, placing, and releasing in a controlled manner. All you need are popsicle sticks and a clean to-go coffee cup and lid.

'
 
After a bit of practice, this little one progressed to holding the cup with one hand and placing the popsicle sticks with the other hand. Well done!


Saturday, November 2, 2024

Developmental Baby Toys: Easy Grip Ball Activity...Another Favorite!


I'm excited to tell you about a fun activity to carry out with your baby using an Grasp Classic Ball and some cloth or organza tissue squares. All you have to do is stuff the cloth squares inside of the ball, and show your baby how to pull them out. This activity will help teach your little one about the concepts of "in" and "out." It is also a great activity to help them use both hands together and to work on their pincer grasp. You can also name the colors of the cloth squares as they pull each one out of the ball. Eventually, your baby will gain the skills to stuff the squares back inside the ball, but that may take a little while. If you don't have any cloth or organza tissue squares, you can just purchase some colorful cocktail napkins, and they will serve the same purpose. Your child will love this activity and it will fully entertain them!


Saturday, October 12, 2024

Developmental Baby Toys: A Few of My Favorite Things!

In this post and several future posts, I'm going to share a few of my favorite baby toys that are great for promoting your child's development! The toys that I will be featuring are wonderful for the development of a variety of skills, including cognitive, and fine and gross motor skills.
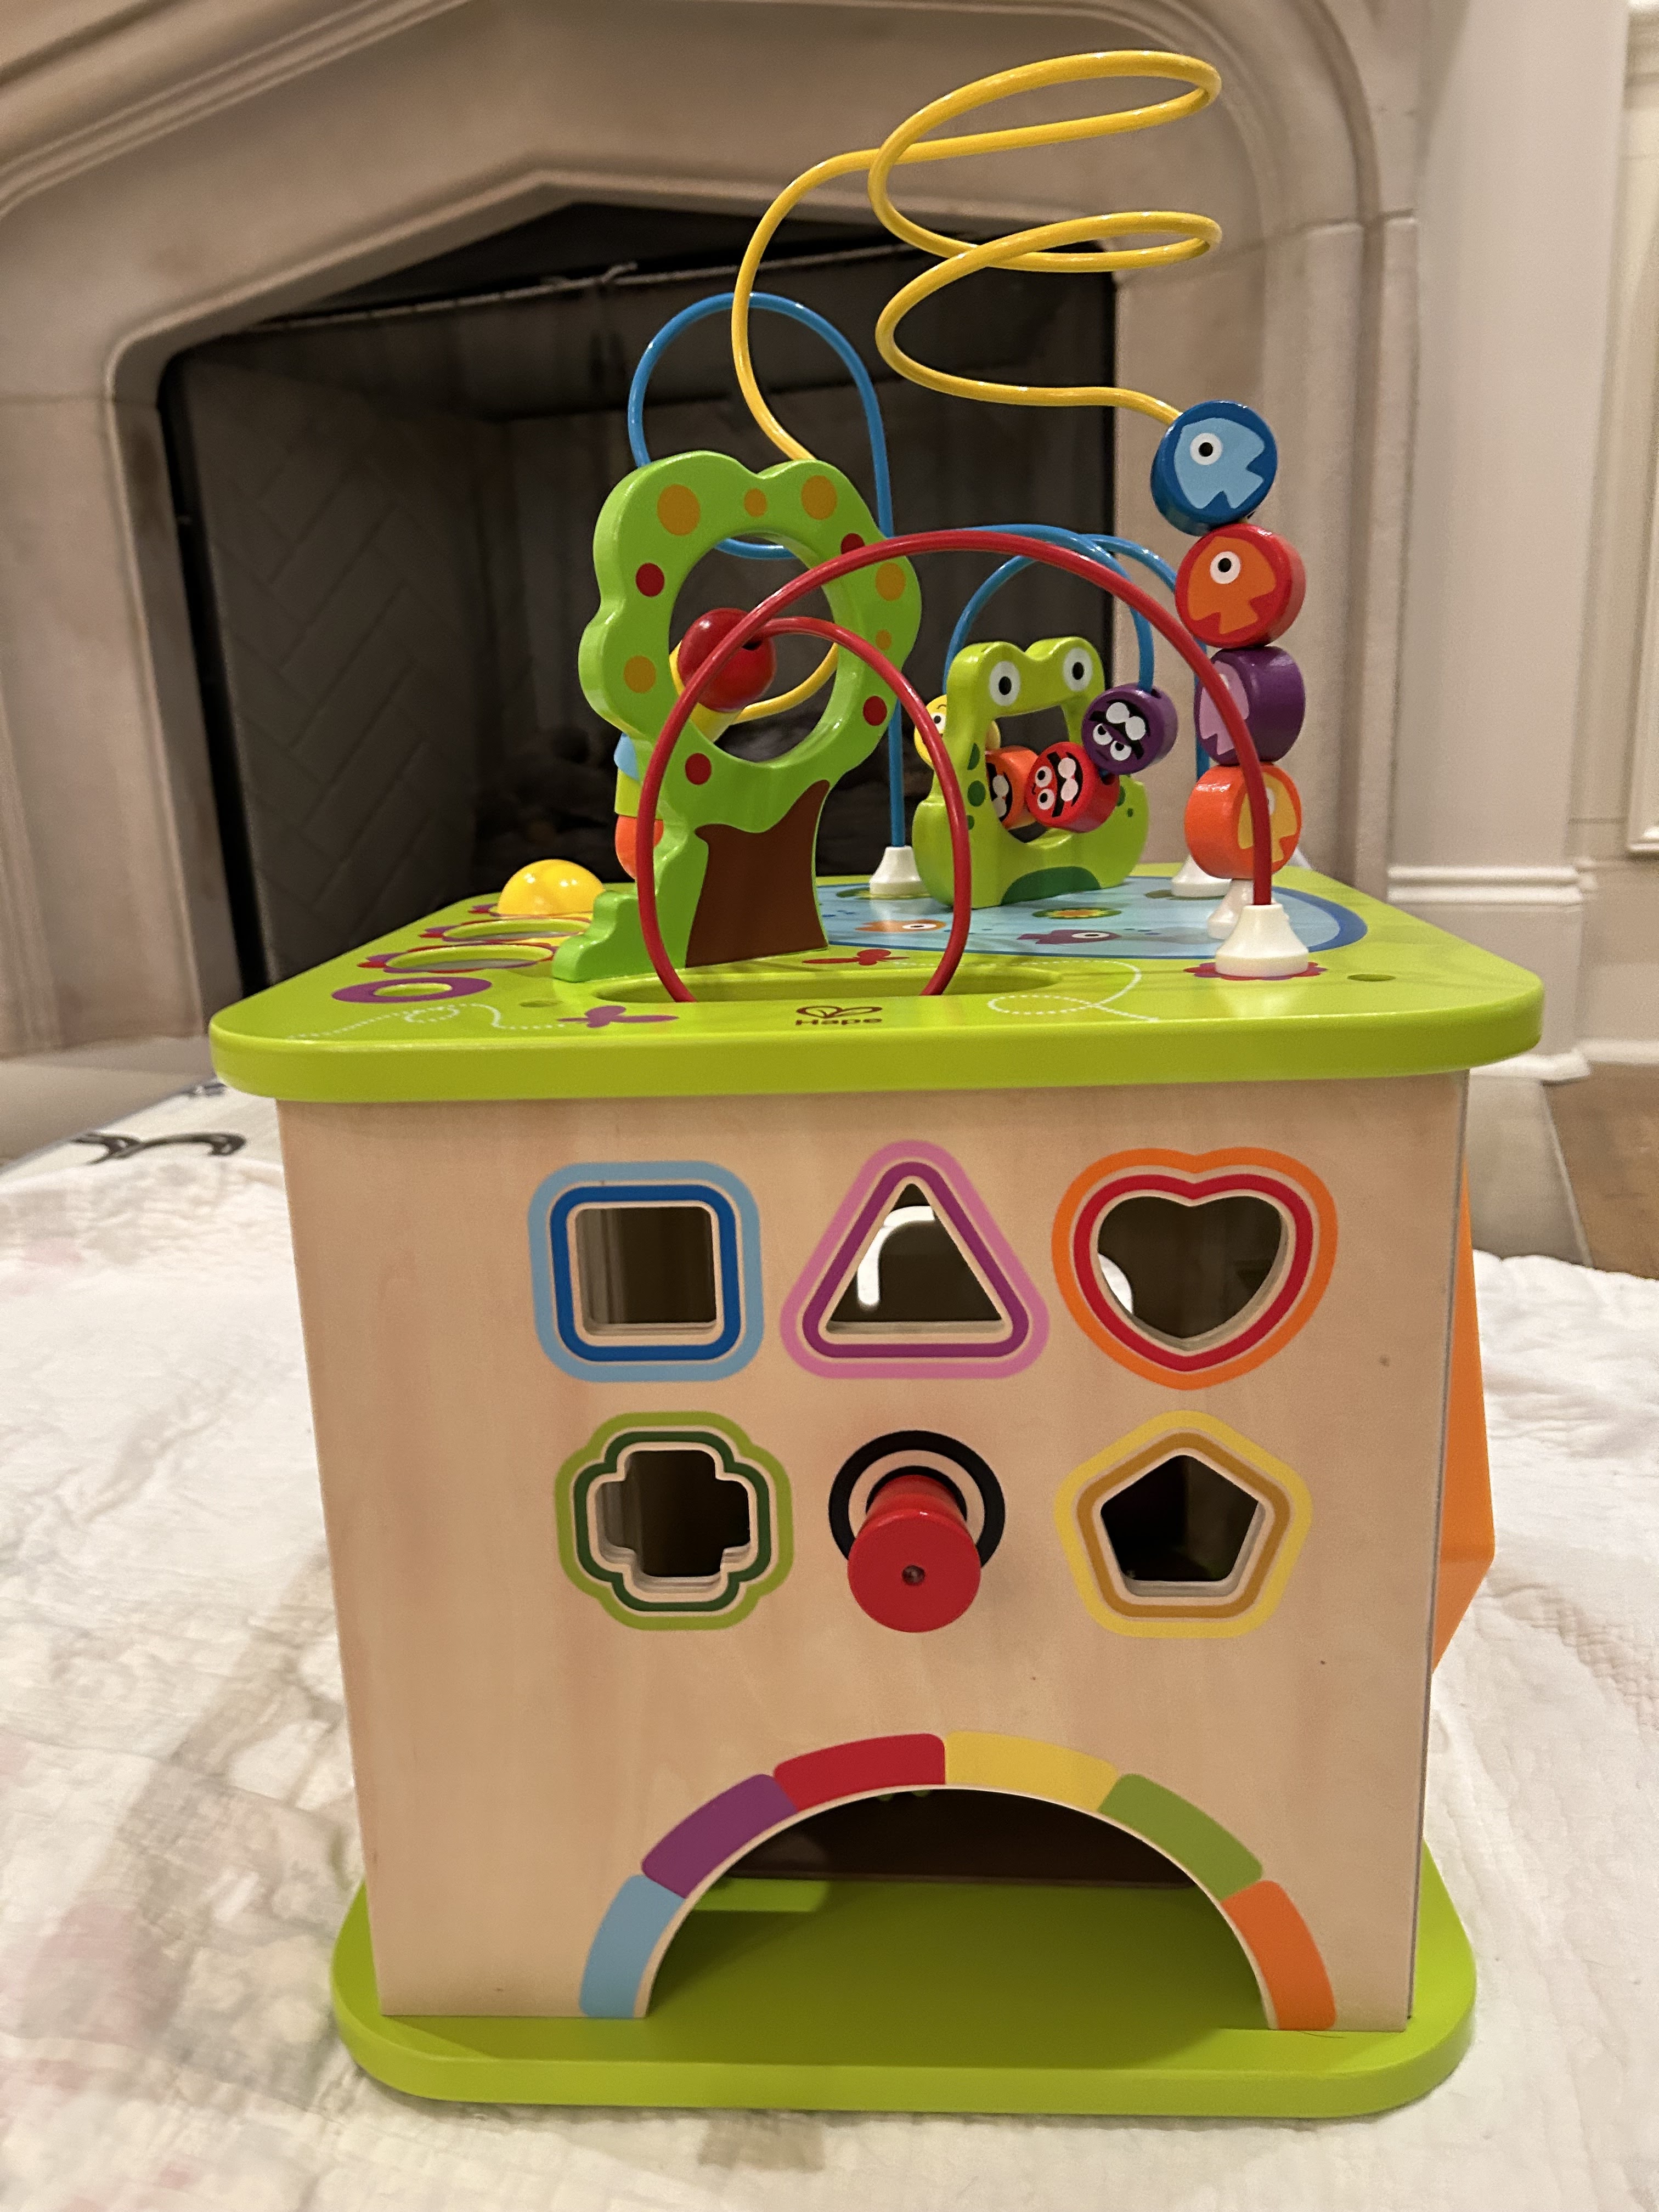
 This Country Critters Wooden Activity Play Cube will keep your baby busy! Each side includes a different activity center with wooden balls, a shape sorter, and much, much, more. My favorite thing about it is that is is sturdy enough for a baby to pull up on and cruise around the edges.
 The activity cube is recommended for ages 12 months to 6 years and will entertain your baby for hours. It is available here on Amazon. 

Friday, July 10, 2020

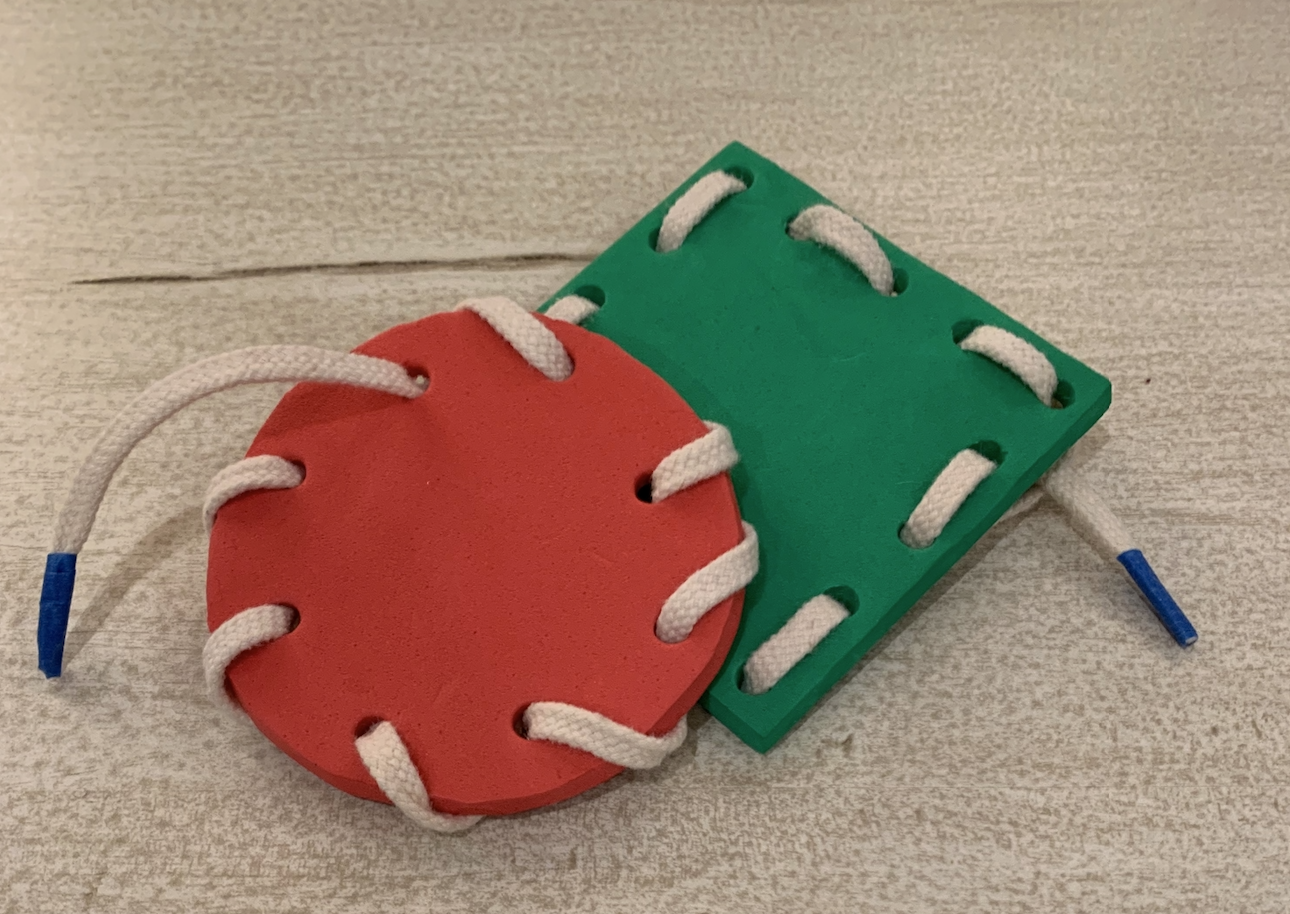
Therapy on a Shoestring Budget: DIY Lacing Shape Cards

These DIY lacing cards are a fun way for a child to work on fine motors skills, bilateral integration (using two hands together), and motor planning! Making them in a variety of shapes and colors will help a child learn to distinguish their differences. You can also use a sharpie to write letters or numbers next to each lacing hole to work on letter and number recognition. Use your imagination to come up with other fun variations!

ITEMS NEEDED:
Scissors, single-hole punch, Colorations Foam Door Hangers, shoe laces, string, or ribbon

INSTRUCTIONS:
Use this shape sheet as a pattern. (The sizes may need to be adjusted.) Trace each shape onto a different piece of foam, and use the scissors to cut them out, and use the hole punch to punch out the lacing holes. (Save the scraps of foam to use with another DIY project that I will be posting about soon.)

If you are using string or ribbon, wrap a piece of tape around each end. Now it's time to start lacing! 

Saturday, January 4, 2020

Teach Buttoning using a DIY Button Board: Make it Fun!

Yes, teaching a child to button can be a fun experience! You might be wondering...how? First of all, don’t try to teach this skill when your little one is getting ready to leave the house in the morning., especially if you are in a hurry. That’s definitely not the time to work on buttoning and other fasteners. Instead, find a time when you can work on the skill using a fun and relaxed approach. You can also make it fun by using a button board.

Practicing on a button board will allow your child to learn and practice the skill away from their body, which makes it easier. Then once he’s learned how to manipulate the button and fabric to complete the buttoning task, he will feel more confident. That’s the time to switch over to practicing on clothing.

Skills needed for buttoning:
Able to pick up small objects using the thumb and index finger (pincer grasp)
Brings hands together at the middle of the body (midline)
Uses both hands together in a coordinated manner (bilateral skills)

Tips for teaching buttoning:

Start with large 1 to 1 ½-inch buttons, and progress to smaller ones. Initially, the fabric that the button goes through should have some stiffness to it. (You can add stiffness or body to fabric by attaching fusible or iron-on interfacing to it.)

Now that you know how to teach buttoning, it’s time to make a button board!

Supplies Needed:
Colorful large (1 to 1 ½-inch) buttons
                             
Felt fabric- (Let your child select the colors!)
                             
Fabric glue or hot glue
Fusible or Iron-on interfacing
Cardboard


1. Have your child select the “theme” for the board. (For example, see the giraffe and snowman.)
2. Cut a piece of cardboard into a rectangular shape (approximately 10-inches x 14-inches)
3. Cut out a piece of felt slightly larger than the cardboard. (12-inches x 16-inches)
4. Glue the felt onto the cardboard. Be sure to wrap the fabric around the edges of the cardboard so that it will look neat.
5. Using different color(s) of felt, cut out the shapes or forms needed for your theme, and glue those felt pieces in place on the board.
6. Iron the interfacing onto the back of the fabric or felt pieces that you plan to use for the button holes. Once the fabric has cooled, cut out the shapes or forms of your choice, then cut the appropriate sized button holes in each one.
7. You’ll need to use a sturdy needle to sew the buttons onto the board.
8. Use a Sharpie marker and other felt pieces to decorate it even more!

Finally, have fun working on those buttoning skills!

The projects above were completed by a Master of Occupational Therapy student at The University of Tennessee Health Science Center and posted with permission.


Tuesday, April 16, 2019

Free Spring Worksheets!

Hi friends!  Here are some free spring-themed worksheets that are good for a child's visual motor and visual perceptual skills. Completing these worksheets is a fun and engaging way for a child to improve motor skills that are so important for everyday tasks. How?  Coloring promotes bilateral upper extremity skills, or the use of both hands together in a coordinated way.  For example, when the child stabilizes the paper with one hand while coloring, drawing, or writing with the other hand, she is utilizing bilateral skills, and bilateral coordination is necessary for tasks such as handwriting, cutting, buttoning, and zipping. 

I hope your child will enjoy these free spring-themed worksheets!


Saturday, October 24, 2015

Fun Toys for Baby's Bilateral Integration Skills!


When a child has intact bilateral integration skills, he can use both arms together in a coordinated manner.  Bilateral skills are important for future tasks like writing and cutting.  These are a few of my favorite classic toys, and they are great for your baby’s bilateral skills! It’s

The farm toy is a wonderful way for your baby to learn words and animals.  Just point the arrow to an animal, and have your your baby stabilize the toy with one hand and pull the lever with the other to hear the animal sound!  There are 16 different farm animals featured on the toy.  And to add to the fun, this classic also plays “Old Mac Donald” and “Farmer in the Dell.”

These snap lock or pop beads are good for your baby's bilateral skills, eye hand coordination and upper extremity strength! 


Sunday, September 28, 2014

Tennis Ball Mania!!! Therapy on a Shoe String Budget


The UTHSC Masters of OT students recently completed a number of awesome media projects! For the assignment, each student was given the name of a common household item.  They were instructed to design a creative, appropriate therapy activity for a patient with a specific diagnosis. They did an amazing job! This media project was submitted by Rochelle. Her common house hold item was a tennis ball!

Materials Needed:

Tennis Ball
Colorful Sharpies
Coins or Buttons
Decorative Pieces of Choice (markers, stick-on eyes, etc.)       

Directions:
-Cut a mouth in the tennis ball
-Decorate the ball

-Hold the ball with one hand
-Open the mouth by squeezing the ball
-Place coins or buttons in the mouth using the opposite hand

This activity addresses fine motor skills, bilateral skills, hand strength & motor coordination and addresses tactile awareness while providing proprioceptive input.

The project above was completed by one of our Master's of Occupational Therapy students at
 The University of Tennessee Health Science Center and posted with permission.

Dear Readers, If you have found my blog to be helpful, please "like" my Facebook page and follow my blog...Thanks :) 


Sunday, June 1, 2014

Activity for Bilateral Skills and Visual Perception!


As a therapist, I frequently work with children on bilateral upper extremity skills. It’s important for a child to learn to stabilize an object or container while performing an activity with the opposite hand. This is a simple, inexpensive activity that addresses bilateral skills and visual perception. When the child is required to copy a pattern, this addresses design copy and color discrimination.

 
All that is needed for this activity are 2 dowels (found at a hardware or craft store) and mini-terry cloth covered ponytail holders (These can be purchased HERE on Amazon). For the child who has difficulty with the task, the activity can be adapted by using a paper towel or toilet paper roll and larger ponytail holders or scrunchies.


Dear Readers, If you have found my blog to be helpful, please "like" my Facebook page and follow my blog...Thanks :) 

Sunday, October 30, 2011

The Recycling Occupational Therapist: An Awesome Book!


As therapists (and parents), we frequently work with children on bilateral upper extremity skills. In many situations we request that a child stabilize an object or container while performing an activity. Handles are great for making grasping easier and for encouraging stabilization.

Here is a cool “recycled” adaptation for adding a handle to your object of choice. This idea comes from Barbara Smith’s wonderful book “The Recycling Occupational Therapist”. (Click here to check out the book)

Just cut a handle from a detergent or dishwasher soap bottle and attach it to your item of choice. To increase the proprioceptive (deep pressure) feedback, enclose sandbags inside the flaps created on either side of the handles.

Directions
Thoroughly wash and dry the detergent, dishwasher soap, or bleach bottle. Labels usually can be removed by soaking the container in hot water and scraping.

1.     Cut around the top and bottom of the bottle.
2.     Create flaps by cutting along the vertical line on each side.
Optional: Insert a sandbag inside the handle before folding and securing the two overlapping flaps. Enclose both ends with Contact adhesive vinyl or duct tape.
      3. Fold the back flap over the front flap. Secure with duct tape.
  
Click here for more information or to purchase "The Recycling Occupational Therapist" by Barbara Smith.
   
You may also want to check out her newest release "From Rattles to Writing"

Tip: I added a handle to a shoe box to which students attach clothespins for finger strengthening. Prior to having the handle on the box, it would just sit on the table and the kids would place the clothespins on it with one hand. Now I require them to hold the shoebox by the handle with one hand, and place the clothespins with the other, turning the activity into a bilateral upper extremity task! Voila!! Thanks Barbara :)

Dear Readers, If you have found my blog to be interesting or helpful, please click here and "like" my facebook page...I'm trying to get my book published and this would be a great help! Thanks :)